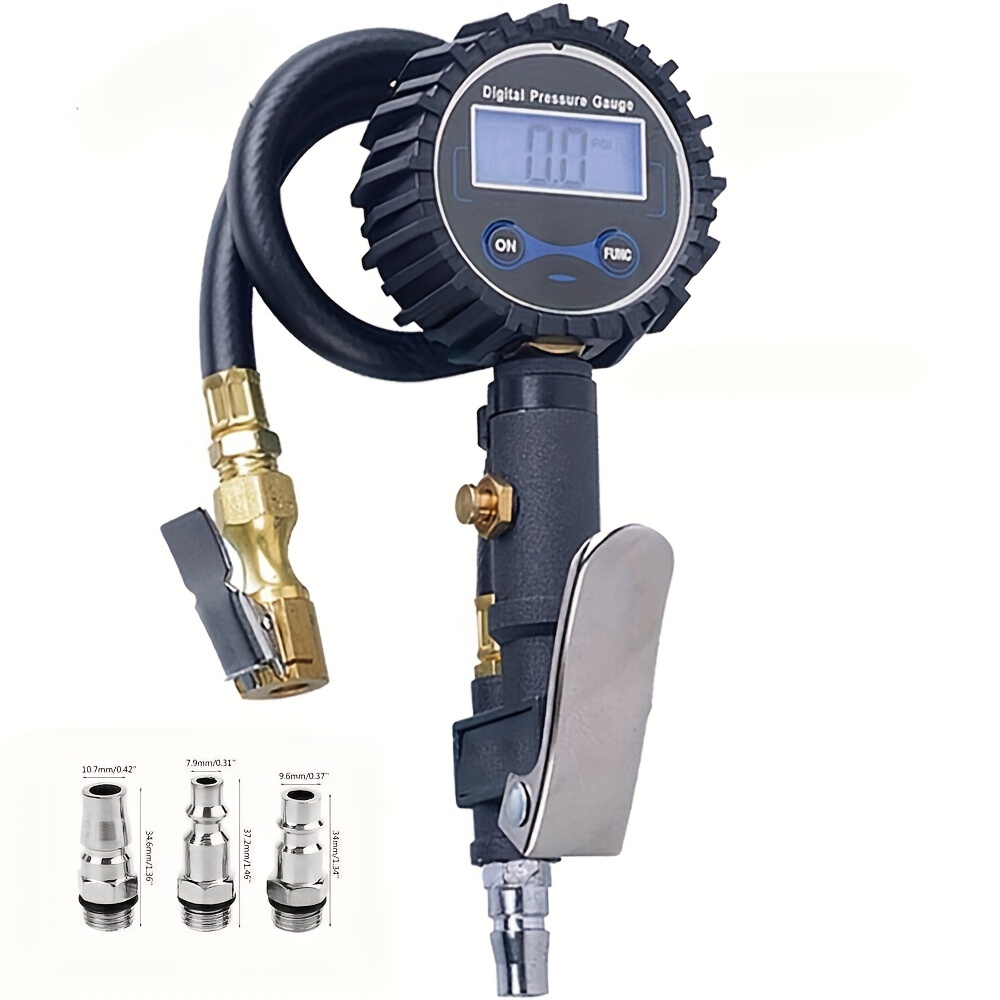
Digital Tire Pressure Gauge Inflator 0-200 PSI LCD Backlight Pistol Grip Aluminum Alloy for Car Truck Motorcycle Bike with 3 Connectors
Digital Tire Pressure Gauge Inflator 0-200 PSI LCD Backlight Pistol Grip Aluminum Alloy for Car Truck Motorcycle Bike with 3 Connectors
Regular price
$45.84 USD
Regular price
$10.84 USD
Sale price
$45.84 USD
Shipping calculated at checkout.
Quantity
Couldn't load pickup availability
996 in stock
Digital Tire Pressure Gauge & Inflator — Precision Reads Up to 200 PSI
Stay on top of tire safety with this professional-grade digital tire pressure gauge and inflator. Featuring a bright LCD backlight, cast aluminum alloy body, and multi-unit display, it delivers accurate readings for cars, trucks, motorcycles, and bikes — day or night, in any garage or roadside situation.
Precision & Readability
- 0–200 PSI Range — Covers passenger cars, trucks, SUVs, motorcycles, and bicycles
- 4-Unit Display — Reads PSI, BAR, KPA, and KGF for universal compatibility
- LCD Screen with Backlight — Clear readings in low-light or nighttime conditions
- Built-in Bleed Valve — Easily release excess pressure to reach target PSI
Built to Last
- Cast Aluminum Alloy Body — Durable, professional-grade construction
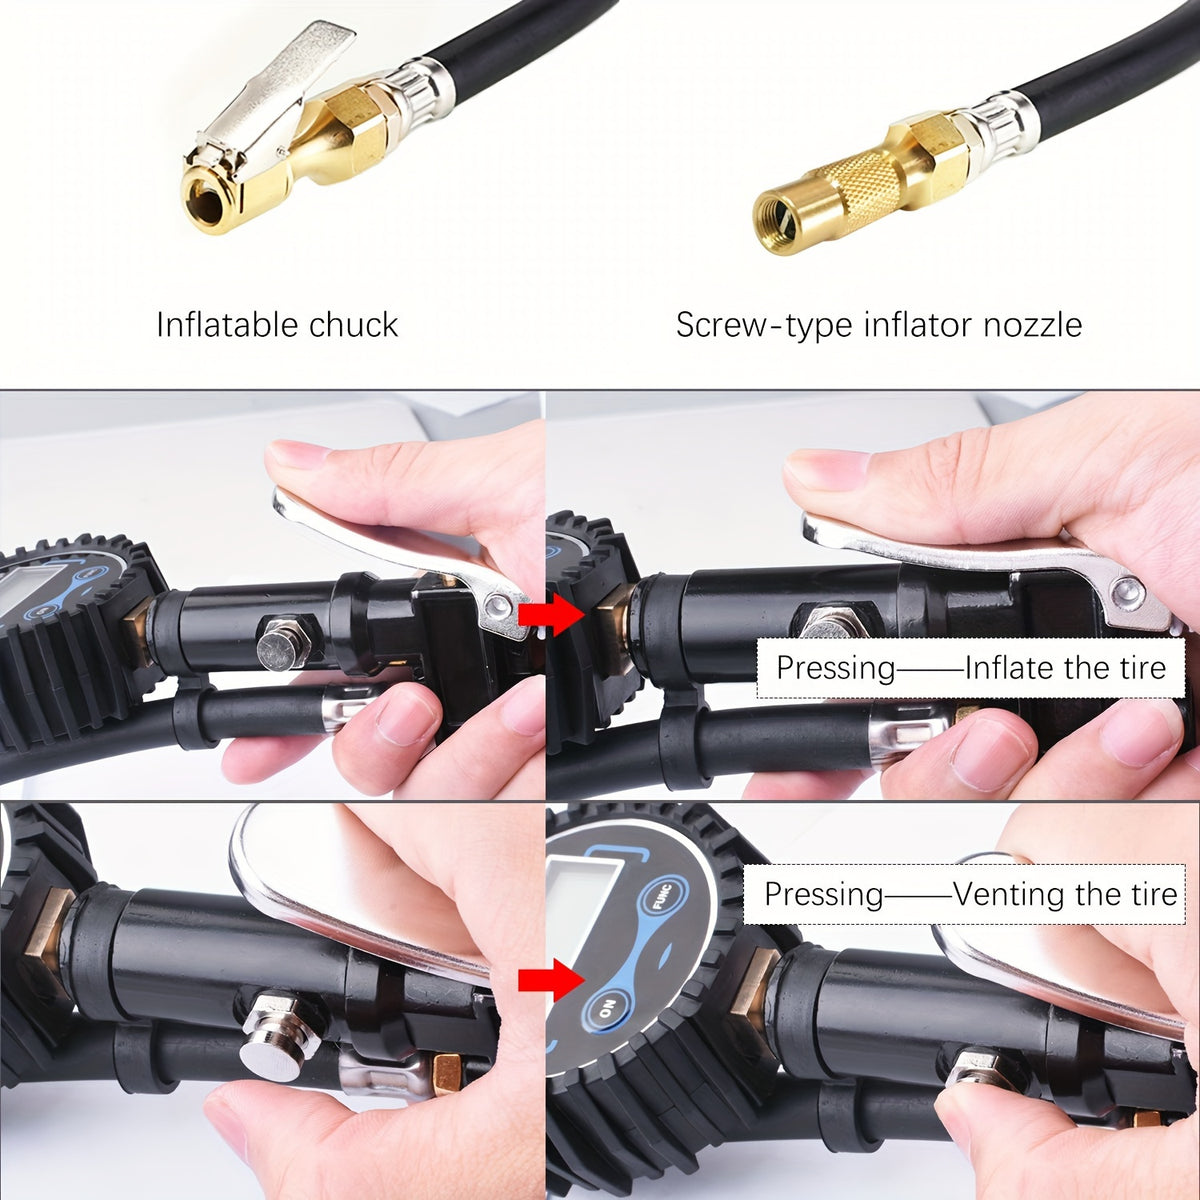
- Brass Chuck with Clip — Secure, leak-free connection to tire valve stems
- Pistol Grip Handle — Ergonomic control for one-handed operation
- 36 cm (14 in) Hose — Flexible reach for all valve positions
Specifications
| Attribute | Detail |
|---|---|
| Pressure Range | 0–200 PSI |
| Units | PSI / BAR / KPA / KGF |
| Display | LCD with Backlight |
| Hose Length | 36 cm / 14 in |
| Body Material | Cast Aluminum Alloy |
| Chuck Material | Brass |
| Power | 2 × AAA Batteries (not included) |
| Connectors Included | 3 pcs |
Compatible With
- Cars & sedans
- Trucks & SUVs
- Motorcycles & scooters
- Bicycles & e-bikes
How to Use
- Remove the tire valve cap.
- Press the brass chuck firmly onto the valve stem.
- Read the pressure on the LCD display.
- To inflate: connect an air pump to the inflator mouth and squeeze the handle.
- Use the built-in bleed valve to release excess pressure if needed.
- Remove the chuck and replace the valve cap.